 How-to
7 Steps to Prepare for Your First Straight Razor Shave
Last Updated: November 10, 2026
Quick Summary
Preparing for your first straight razor shave means checking that the blade is sharp, softening your skin with warm water, and building a good lather with a brush. Plan the shave for an unhurried day, since rushing is the most common reason beginners nick themselves.
- Plan your first shave for a day when you are not rushed.
- Check the blade's edge before every shave; a dull blade pulls and causes irritation.
- Soften skin with a hot shower or warm towel for two to three minutes.
- Build lather in a brush and apply it in layers, letting it sit for a minute.
- Start your first shave on the cheek and sideburn, the least risky areas.
Table of Contents
- What a First Straight Razor Shave Requires
- Straight Razor Shaving Tools for Beginners
- How to Check That the Blade Is Shave-Ready
- How to Prepare Skin for Shaving
- How to Build Lather and Set Up Your Shaving Area
- How to Shave with a Straight Razor Without Cutting Yourself
- How to Use a Straight Razor with Replaceable Blades and Plan Your Next Shave
- Frequently Asked Questions
What a First Straight Razor Shave Requires
Preparing for your first straight razor shave takes more planning than a cartridge shave, and the preparation is what keeps it safe. Most of the work happens before the blade touches your face.
The main ingredients are simple. You need a sharp, shave-ready razor, a brush and lather, a warm face, and a clear, unhurried block of time. Some beginner guides recommend letting your beard grow for two to three days before the shave, while others suggest at least 24 hours, so there is no single agreed-upon length. Growth of a few days gives the blade something to cut, but it is practitioner advice, not a measured standard.
Plan your first shave for a day when you are not rushed. Rushing is the most common reason beginners nick themselves.
Straight Razor Shaving Tools for Beginners
A beginner setup does not need much. Focus on four items: the razor, a shaving brush, a shaving soap or cream, and a stone or strop for keeping the edge sharp.
Many beginners start with a basic, well-made razor rather than an expensive collector's piece. A simple, reliable razor is easier to control while you learn the grip and angle. Prices vary by brand and material, so check current listings from retailers before you buy.
Keep the rest of the kit basic too. A soft brush, a bowl or mug for lather, and a clean hand towel cover most needs. For a more hands-on, guided experience, you can also book a traditional shave with a professional. You can book a traditional shave with A CUT ABOVE to see the full experience before you invest in tools.
How to Check That the Blade Is Shave-Ready
A blade that is not sharp will pull at hair instead of cutting it, which causes irritation and encourages pressure you do not want. Check the edge before every shave, and understand what kind of edge you are checking.
Honing versus stropping. These are two different jobs, and beginners often confuse them. Honing grinds fresh steel against a sharpening stone to restore the bevel and cutting edge. It is a maintenance task performed every few months of regular use, or whenever the edge has dulled.
What a beginner can safely check. You do not need to test the edge with your thumb pad or run a finger along the blade. Use these low-risk checks instead:
- Look along the edge under bright, angled light for chips, rust, or a bright line of reflected light that signals a dull or rolled edge.
- Gently draw the edge across the back of a thumbnail at a shallow angle; a shave-ready edge catches smoothly and evenly, while a dull edge skates or snags.
- Run the blade lightly across a hanging hair held away from your skin; a sharp edge will catch and cut it, while a dull edge slides off.
- Confirm the blade is clean, dry, and free of soap residue before you start.
- Strop the blade on a leather strop before each shave, following the razor maker's instructions, and keep the spine flat against the leather.
When to use a professional honer. If the blade pulls, snags, feels uneven along its length, or fails the hanging-hair check after stropping, do not attempt to fix it yourself on a stone.
Watch out: a blade that fails any check should not go on your face. Dull blades are the most common cause of razor burn for beginners, and pressing harder to compensate is how nicks happen.
Before any first shave, the blade's readiness depends on which checks you run and when to hand it to a professional.
| Check | What to look for | When to act |
|---|---|---|
| Hanging-hair test | Sharp edge catches and cuts the hair | Dull edge slides off: do not shave |
| Thumbnail test | Edge catches smoothly and evenly | Skating or snagging: re-strop or honer |
| Visual inspection | No chips, rust or rolled edge | Chips or rust: send to a professional honer |
| Strop | Light realignment on leather before each shave | Blade still tugs: needs honing |
| Honing | Fresh steel restored on a stone | Needed every few months of regular use |
How to Prepare Skin for Shaving
Warm, softened skin is much easier to shave. Take a hot shower for several minutes, or hold a warm, damp towel on your face for two to three minutes, to soften the hair.
Then wash your face with a gentle cleanser to remove oil and dirt. Clean skin lets the lather and the blade work evenly.
Pay attention to your skin during prep. Stop if you have open cuts, active acne, or irritated patches on the area you plan to shave. Wait until the skin heals before you try a straight razor on it.
How to Build Lather and Set Up Your Shaving Area
Good lather is the cushion between the blade and your skin. Work a small amount of shaving soap or cream into the brush, then whip it in a circular motion with a little warm water until it forms a thick, creamy foam.
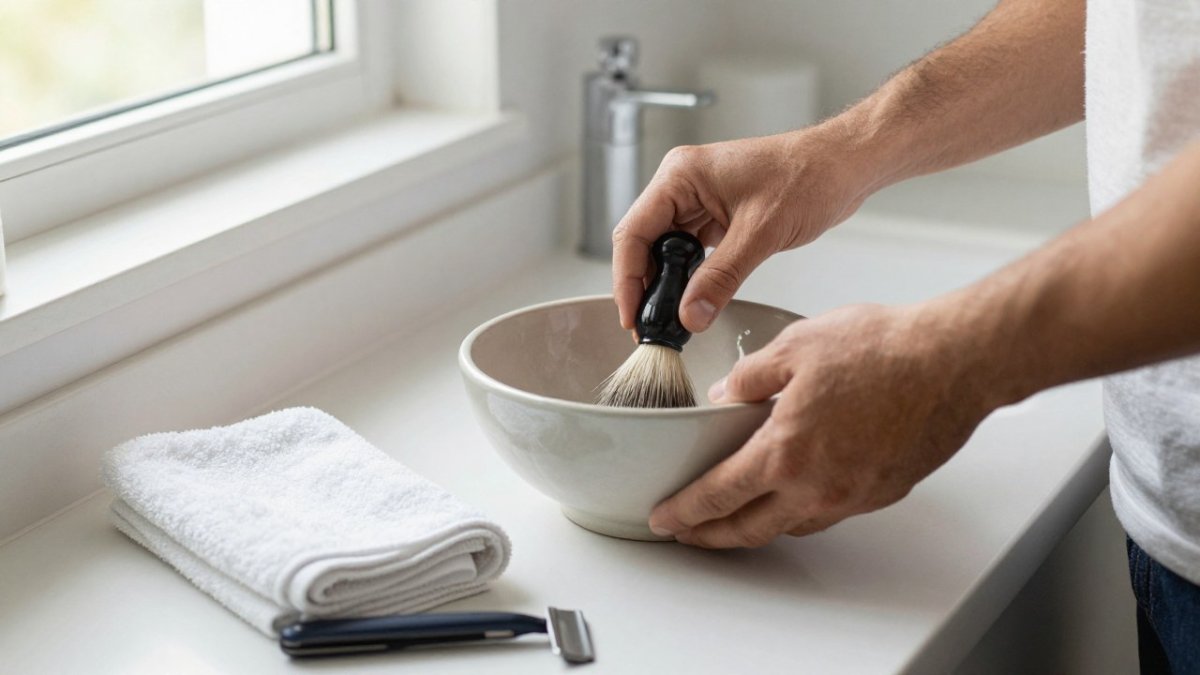
Apply the lather to your face in layers. Build it up on the areas you plan to shave, and let it sit for a minute so the hair softens further.
Set up your space before you start. Lay out your razor, towel, brush, and a small bowl of warm water on a stable counter. Keep the area dry and well lit, and do not shave when you are tired or distracted. A calm, prepared setup helps you move slowly and carefully. For ideas on building that kind of routine, see our guide to grooming rituals that ease stress.
How to Shave with a Straight Razor Without Cutting Yourself
Hold the razor with a relaxed, firm grip on the handle, and keep the blade at a shallow angle to your skin.
A realistic first-shave plan by face area. Your first shave is not the day to chase a close, complete shave. Treat it as a practice pass on the easiest areas and stop while you are ahead. Rank the areas like this:
- Easy and low-risk: the flat of the cheek and the sideburn line. Start here with a single with-the-grain pass.
- Moderate: the upper lip and the jawline. The jawline curves, so keep the angle shallow and take short strokes rather than one long sweep.
- High-risk: the chin, the neck, and under the nose. The chin is bony and easy to nick; the neck has loose skin and changing grain direction; under the nose leaves little room for the blade.
A conservative first pass on the cheeks and sideburns, with the rest left for later sessions, is a successful first shave. Add one new area per shave as your grip and angle settle.
Skin stretching and hand positioning. Stretching is what keeps loose skin from folding into the blade. Use the free hand to pull skin taut just ahead of where the blade will travel.
Steps for each pass.
- Stretch the skin taut with your free hand.
- Start on the least sensitive area, usually the cheek.
- Use light pressure and short, even strokes, rinsing the blade often in warm water.
- Shave with the grain first, then go across or against it only if you need a closer result and your skin handles it.
- Wipe the blade dry between passes and keep the edge away from the faucet and counter edge.
- Stop if you feel a pull or sting, and do not press harder to finish an area.
Troubleshooting common beginner problems. Map the symptom to the likely cause before you change anything:
- Tugging or skipping: the blade is dull, the lather has dried out, or the angle is too steep. Stop, re-lather, and check the edge rather than pressing harder.
- Scraping or a raw feeling: too much pressure or too steep an angle. Lighten up and flatten the blade toward 30 degrees.
- Irritation and redness after the shave: too many passes, shaving against the grain too early, or shaving irritated skin. Drop to one with-the-grain pass next time.
- Repeated nicks in the same spot: the skin is not stretched, or you are using long strokes over a curve. Shorten the stroke and re-stretch.
Watch out: stop the shave immediately if you feel a sharp sting or see more than a small nick. Press a clean towel to the cut, and seek medical help for a cut that will not stop bleeding or a skin problem that worsens.
When you finish, rinse your face with cool water and apply a gentle, alcohol-free balm if your skin tolerates it. Dry the razor completely and store it in a safe place out of reach of children.
How to Use a Straight Razor with Replaceable Blades and Plan Your Next Shave
Some straight razors use replaceable blades instead of a honed steel edge. These are often easier for beginners because you can swap a dull blade without sharpening. Check the manufacturer's instructions for compatible blades and handle them carefully, since they are very sharp.
Plan your next shave as well. Keep a simple log of what worked: how long you let the beard grow, which soap you used, and how your skin felt afterward. Adjust one variable at a time.
If you prefer to leave the process to a professional, professional men's grooming services can help you compare options and decide what fits your routine.
Your first straight razor shave goes best when you prepare the blade, the skin, and the space before you start. Take your time, use light pressure, and stop at the first sign of trouble. If you want a guided, unhurried experience with a professional, A CUT ABOVE offers traditional hot towel shaves in Maryland. Book a visit to see how a relaxed, precise shave feels before you try it at home.
Frequently Asked Questions
How do I shave with a straight razor for the first time?
Start with a fresh, shave-ready blade, soften your beard with a warm towel or hot shower, and build a thick lather. Hold the razor with light pressure at about a 30-degree angle, and shave with the grain using short, even strokes. Take your first few shaves slowly on one area at a time, such as the cheek, and stop if you feel sharp resistance or see the skin pull. Plan to practice on the easier areas before tackling the neck.
Is a straight razor hard to learn?
A straight razor has a learning curve, but most people can get a comfortable first shave with careful preparation and patience. The main challenges are controlling the blade angle, keeping pressure light, and reading how your skin responds. Shaving with the grain on easier areas first builds confidence. Many beginners find the technique becomes more natural after several shaves, so treat early sessions as practice rather than a test of skill.
What should I use to prepare my skin before a straight razor shave?
Wash your face with a gentle cleanser and use warm water or a hot towel to soften facial hair and open the pores. Apply a pre-shave oil or lather to protect the skin and help the blade glide. Avoid shaving over broken skin, active irritation, or sunburn, since these areas are more likely to nick or sting. Skin stretching with your free hand keeps the surface taut and reduces the chance of cuts during each stroke.
What should I do if I cut myself during my first straight razor shave?
Stop shaving immediately and rinse the area with cool water. Apply light pressure with a clean cloth or styptic product until the bleeding slows. Do not return to that area until the skin has settled. Review your blade angle, pressure, and stroke length before your next session, and check that the blade is sharp and free of nicks. If bleeding does not stop after sustained pressure, seek medical attention.